Easy HDR without a Tripod
HDR photography. Ahhh! You either love it… or you’re wrong!
The beauty of HDR is that its beautiful. High Dynamic Range photos have vibrant colors and tactile textures that make you want to sing!
One of the main inconveniences preventing more photographers getting going with HDR photography is that you need to take all your photos using a tripod. That’s right isn’t it – otherwise it just doesn’t work. But… a tripod is heavy, awkward, irritating, it slows you down, its embarrassing and that’s the end of that.
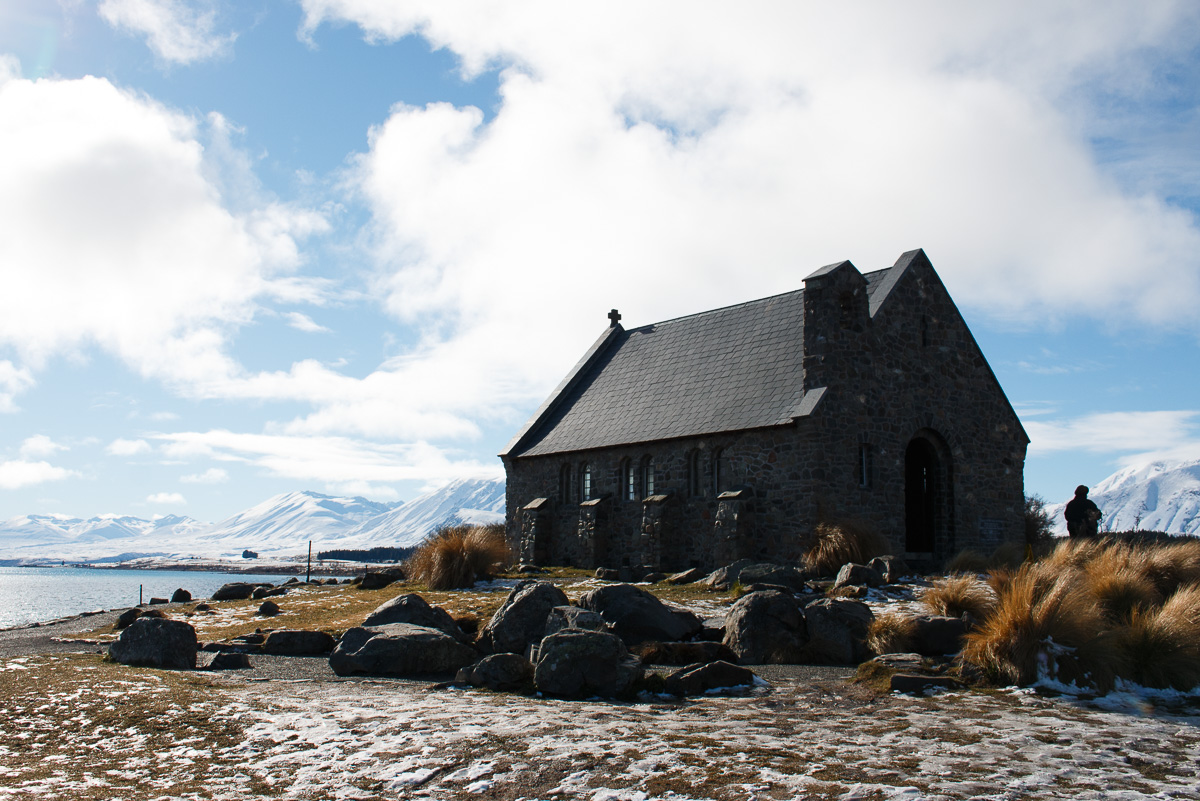
But, you see, that’s not entirely true. On a recent trip to New Zealand I cleverly left my tripod in my car back in the Sydney airport carpark. Disaster? Not quite. Check out these before and after photos of this church at Lake Tekapo, taken hand-held.
So, without further ado, here are 4 easy steps to take great photos in HDR without a tripod (these are based on the Canon 70D but most other DSLRs will have similar settings – consult your manual):
1. Setup your camera for HDR by selecting a bracket of 3 shots at -2EV, 0EV, +2EV. This is fine for most lighting situations and when hand-holding its best to minimize the amount of shots in the bracket. Always use Aperture Priority mode for HDR as this ensures all the shots have the same depth of field. And, finally, set the camera’s drive mode to Continuous Shooting – this causes the three shots to be fired off in rapid succession with only a single press of the shutter release.
2. Set your camera to a 2 second shutter delay. This gives you a crucial 2 second gap between pressing the button and the shots being taken, enabling you to re-stabilize yourself and the camera.
If you’re lucky and you have a camera with a Custom exposure mode setting, you can save all these settings and then easily access this entire HDR configuration by simply selecting the Custom mode. You should also save a preferred aperture and ISO – I’d recommend f8 and ISO100 as a good starting point for HDR. For more detail on Custom mode see this previous post.
3. Use a wide angle lens. The wider the lens the less any movements you make between (or during) exposures will be noticeable. These days the HDR software is excellent at compensating for any minor movements you do make between shots (like breathing!).
4a. Notice the shutter speed that your camera has metered for the first (normal 0EV) exposure. Then multiply this by 4. That will give you the shutter speed that it will use for the longest (+2EV over-exposed) shot. This needs to be a shutter speed that you’d be comfortable hand-holding for any normal shot. For example if the metered speed is 1/125th, then the longest exposure in the bracket will be 1/125 x 4 which is 1/30th second, which is fine if you’re using a wide angle lens. Of course anything faster is even better.
4b. If you need faster shutter speeds either increase your aperture (using lower f numbers) or if the aperture is fully open, increase your ISO. Increasing ISO will introduce more noise into the photos but modern cameras and software are getting much better at minimizing the impact of this so don’t worry about it too much.
And that’s it! With a wide angle lens, a 2 second shutter delay and a reasonably fast shutter speed, those three shots will be sharp enough and aligned enough for the software to easily iron out any discrepancies.
Having tried many different ways to process my HDR photos, I think the best results are achieved using a combination of software: Photomatix, Lightroom and Photoshop. With a bit of practice, and some tricks to streamline the process, you can get great results in only a few minutes with lots of potential for personal creativity and minimal headaches. I’ll show you how in a future post…
In Other News
If you want to keep up with all the latest trends in photography gear and techniques the only place you need to go is This Week In Photo. Its a regular weekly podcast hosted by the ultra-smooth Frederick Van Johnson.
And if you want to learn photography techniques, and how to use lightroom and photoshop there’s only one place to go for that too. The recently renamed and merged KelbyOne now combines all the online training videos from Kelby Training with all the resources of the National Association of Photoshop Professionals (NAPP). Its money very well spent!
Finally, if you haven’t already subscribed, Adobe have an amazing proposition for photographers. Get both Adobe Lightroom and Photoshop (essential post processing tools for HDR photographers) for just $9.99/month on their Creative Cloud Photography Plan. This is one of those rare times when its really easy to reach for your wallet!
Leave a reply
The Best Camera for HDR
Recently I got lucky. Very lucky. Following a recent shoot I briefly put my camera down on the roof of my car to fumble for my keys… and watched it slide slowly off and hit the tarmac with a painful crunch and the merry tinkling of shattered plastic and glass. This was lucky for two reasons: firstly, because the camera was insured; and secondly, because it forced me to look for a new DSLR. And therein lay the serendipity!
One of the irritating limitations of almost all DSLR cameras to date has been their half-hearted implementation of the primary feature required by HDR photographers – exposure bracketing. This is the process whereby several shots of exactly the same are taken in a single burst, with the camera automatically adjusting the shutter speed so that each one at a different exposure. Most DSLRs can do this.
Subsequently these “bracketed” shots are combined together using HDR software on a computer to produce a single image with the full dynamic range of the scene (from deep shadows to bright highlights) all well exposed.
Nikons allow you to take 5 photos in a bracketed sequence, but they limit you to one stop increments. So the 5 photos cover a range of -2 to +2 stops: -2, -1, 0, +1, +2. In practice the -1 and +1 photos don’t add anything much to the process so to save processing time these often aren’t used.
Canons normally let you take only 3 shots in the sequence but they allow increments of 2 stops, so this results in a more practical bracketed sequence of 3 photos: -2, 0, +2. So this is pretty similar to Nikon.
The problem is that in many situations where there are elements of high contrast this range of 4 stops is not enough to properly capture the dynamic range of the scene. For example the common situation of a dark church interior with bright sunlight illuminating stained glass windows.
There are workarounds of course, but they’re fiddly and involve extending the bracket set by taking more photos at higher or lower shutter speeds. This is achieved by either: Manual shutter speed changes (with your camera on a tripod take several shots, carefully adjusting the shutter speed by 2 stops between each); or by exposure compensation adjustments (take a first bracketed set with exposure compensation at -2 stops, then a second set with exposure compensation at +2). But that’s all way too much trouble. Fortunately there’s now a much better way!
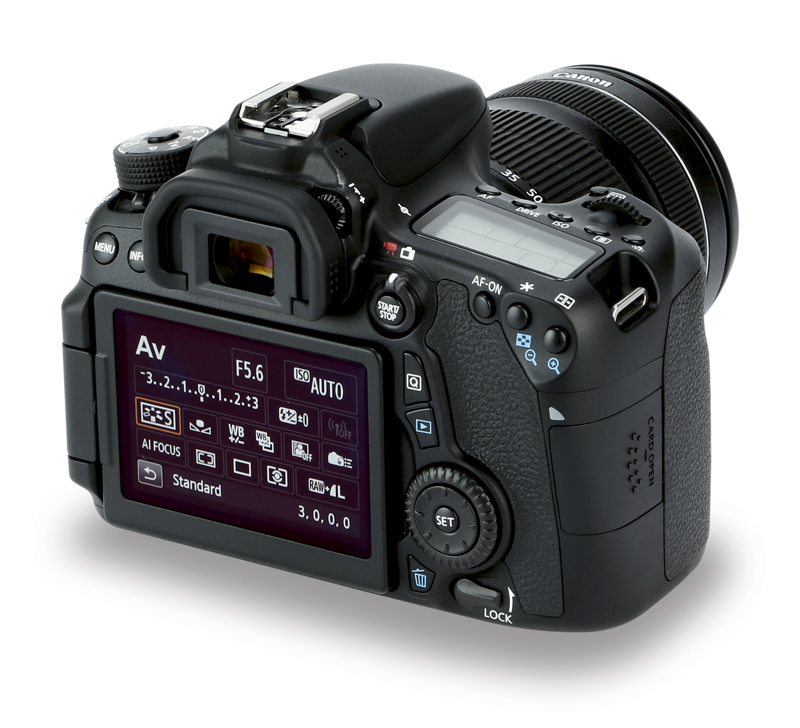
The Canon 70D has much more versatile exposure bracketing controls. It allows you to take up to 7 shots in a bracketed group, and in increments of up to 3 stops each. That’s a total dynamic range of 18 stops, which is as much flexibility as you’ll ever need!
Another key feature available on this camera which seals the deal for the HDR photographer is the “Custom” mode on the exposure selection dial. This can be programmed with your preferred HDR setup, including number of bracketed shots (usually 3, 5 or 7), bracketing increment (1, 2 or even 3 stops), and an initial aperture and iso. To switch from standard photography in Aperture Priority mode to HDR photography is then just a simple twist of the dial and you’re immediately ready to go. So, for example, you can quickly switch to HDR as you walk into that old church, and just as quickly switch back to Av as you walk out. Its perfect!
In the next post I’ll show you some how I use this camera to easily and quickly make great HDR photos, even without a tripod.
In Other News
The news is bad. It always is! Read any newspaper or watch any TV news channel and all you see is war, nasty politics and misbehaving celebrities. One of the best examples of incessant bad news presented by paranoid and hysterical reporters and fully intended to outrage and horrify us is the UK’s Daily Mail. To this laughable journal of scaremongering schlock and depraved trivialities everything appears to either cause or cure cancer, and everything else is the fault of immigrants!
But now there’s a great alternative. The English philosopher Alain de Botton has written a new book about the adverse impact of the news media on our lives and our wellbeing. And to try to counteract all that relentless negativity and nastiness he and his School of Life have started their own online alternative, The Philosopher’s Mail. It looks at stories currently in the news and tries to present the same information in a “nicer” more positive and productive way. Give it a try – its a concept that we should all support.
Leave a reply
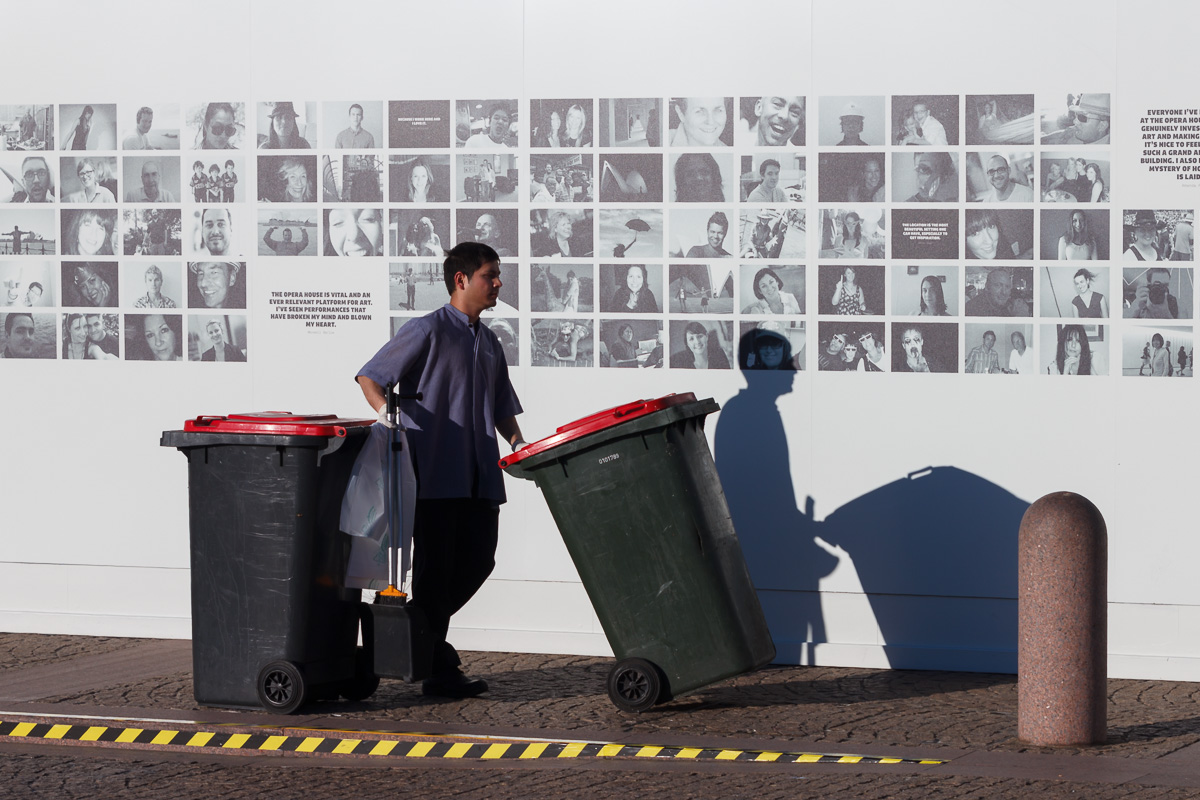
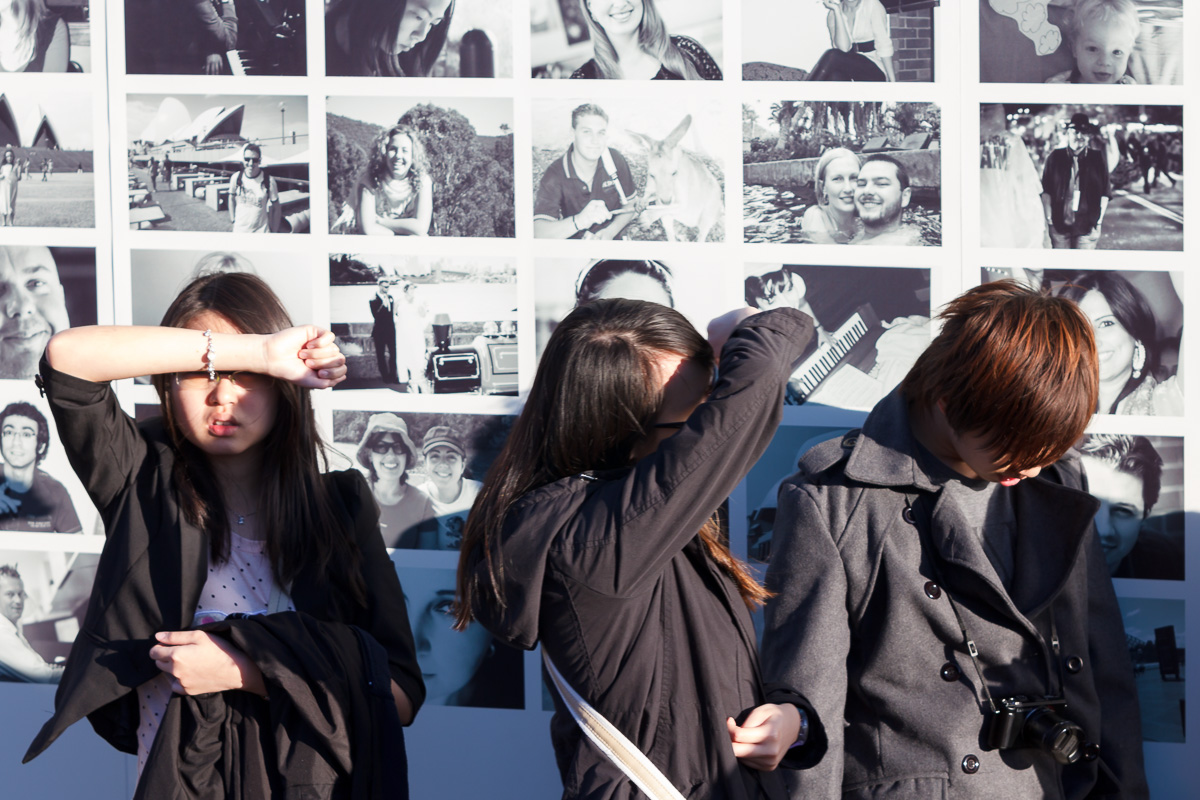
Another Point of View
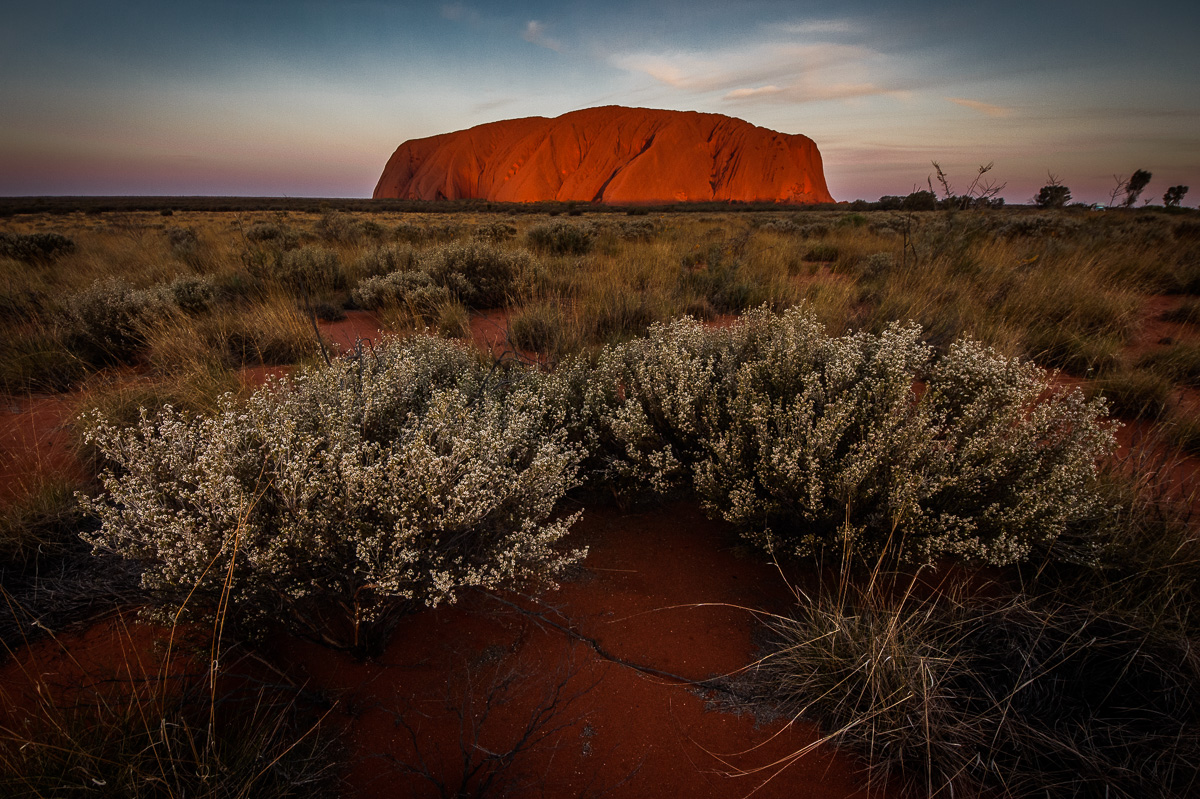
When you visit a major tourist attraction along with hundreds of other tourists, how do you come away with photographs that are a little bit different? The answer is simple: Use your feet!
At Uluru (aka Ayers Rock) deep in the red desert in the very center of Australia everyone heads out for sunset. Over a period of about half an hour as the setting sun lights up the rock from directly behind your back, the colors of Uluru slowly change from pink to orange to red to purple. Its a beautiful sight and well worth the gigabytes of space it uses up on the thousands of tourist cameras which record every moment.
But… all those tourists are carefully corralled into a long narrow viewing area. They park their cars and stand by a fence and watch while their shadows stretch out in front of them. And they point their cameras in the right direction and snap away. The result is that everyone gets a good photo but everyone gets more or less exactly the same photo. This scene is repeated at countless view points, at sunrises and at sunsets throughout the world.
So for something a bit different, try this. Walk out of the corral and up the road a bit. Take a couple of steps into the bush and find a different and more unique view. Look for something different to include in the frame as foreground interest. Try climbing something or getting low to the ground for a change of perspective. So don’t be a sheep and your photos will (usually) be better for it.
In Other News
For those who live part of their lives in the lands of Middle Earth, this is a big day. The worldwide release of the second part of Peter Jackson’s movie of JRR Tolkien’s book The Hobbit is about to begin, and the world is suddenly a better place. For reasons best known to the High Elves the movie can be seen first by the dwarves in the low countries of Europe – Belgium for example! And for darker reasons, known only to the residents of Mirkwood, the orcs and goblins of South America must wait another couple of weeks.
But if you can’t wait the trailers and other videos on the official website may satisfy your craving…
Leave a reply
High Dynamic Range
HDR has been a controversial subject in the world of photography. Some of the best and most popular photos have been made with High Dynamic Range techniques. And also some of the worst.
The recent history of art has encouraged and even required its artists to push boundaries as far as they’ll go. Painting reached astonishing levels of photo-realism in the 17th century, but in more recent years there came the impressionists, the minimalist abstracts and the expressionists, and society’s expectations and perceptions of painting were blown explosively out of the water. Some contemporary journalists were clearly unimpressed:
Wallpaper in its embryonic state is more finished than that seascape.
Louis Leroy (on Monet)
HDR photography is still a very new technique. When it suddenly became popular a few years ago it was often used without subtlety, and the Harry Potter school of photographic wizardry was born. But the backlash was equally unsubtle. The result was that these expressionist techniques were refined and the volume turned way down, and then the real value of HDR became obvious.
We’re used to cameras only telling part of the story. The range of tones they can capture is much more limited that those we can see. So the photographer has to compromise and make a decision. Shadow or light? Often the result is all the better for this limitation, as a tale half told can leave interesting questions dangling around the frame. But sometimes it’s good to tell the whole story.
HDR reveals what’s hiding in the shadows or drowning in the highlights. It reaches in and pulls out textures and colors, and suddenly a new more intense reality emerges. In capable hands it’s very impressive stuff.
The godfather of HDR is Trey Ratcliff. He posts a new HDR photo on his blog Stuck in Customs every day, and some of these photos are stunning. If you’re a photographer and haven’t tried this yet, read his free introductory tutorial and give it a go.
In Other News
So many books but so little time!
When you pick up a book and start to read you’re making a big commitment – it may take many days or even weeks before you turn that final page. So if you’re going to read a book you’d better make sure it’s a good one.
Following hard on the heels of David Bowie’s list of his 100 favorite books, released a couple of weeks ago, here’s a recent interview with Woody Allen in which he describes just 5 books that most influenced him.
My advice? Read the classics. The clue’s in the title…
Leave a reply
Gesture
Straight-talking New York street photographer Jay Maisel is a living legend, and his insights on the subtle complexities of street photography are unique and priceless. One of his fundamental concepts is Gesture.
Its difficult to define but might best be described as the emotional trigger of a photograph. It can be a human gesture such as a facial expression or body position, or something more esoteric such as the interaction of some other elements within the image. Its the quality of this “gesture” that differentiates one photo from all the others and gives it that extra something which holds your attention.
Everything in the world has gesture. Its not about just people. You have to wait for something special to happen
Jay Maisel
In Jay’s opinion, gesture takes precedence over the more traditional technical requirements for a good image (lighting, framing, color, etc) as without it a photo can be good but it can’t be unique and so it won’t be great.
Jay holds photography workshops in his huge old bank building in Manhattan, but these cost several thousand dollars. An easier and cheaper way to learn from this master of the craft is to watch his online video courses hosted by Kelby Training. Worth every cent of their $6.99 rental!
And here’s his portfolio.
In Other News
Today is the 50th anniversary of the assassination of JFK. He may be long gone, but it looks like those conspiracy theories will live forever. Here are some merged “then and now” photos showing some of the places where it all happened.
Leave a reply